
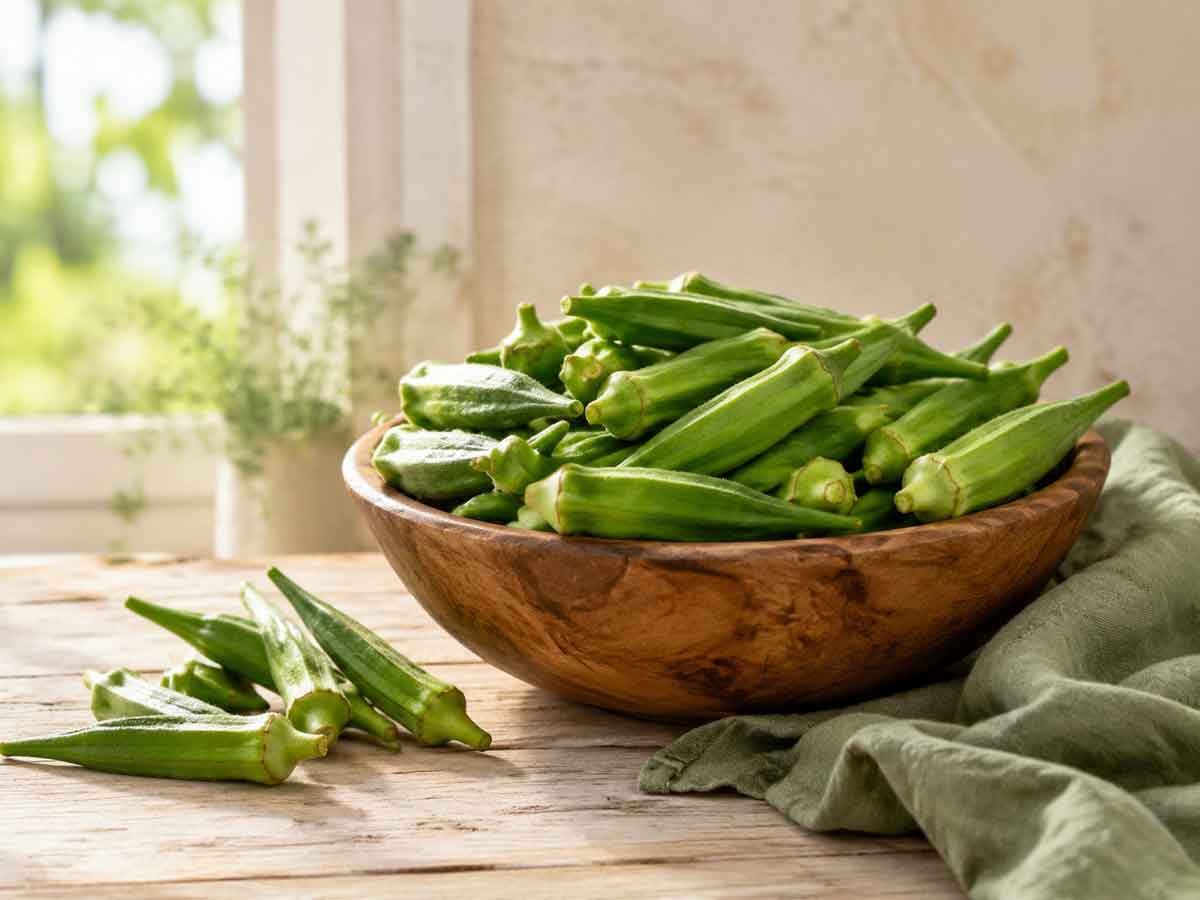
Okra is one of late summer’s most distinctive vegetables. Its ridged green pods flourish in hot weather, arriving just when corn, tomatoes, peppers, and other warm-season favorites are at their best. Although it is closely associated with Southern cooking, okra is also an important ingredient in African, Caribbean, Middle Eastern, Indian, and Mediterranean cuisines.
Fresh okra has a mild, grassy flavor that becomes sweeter and nuttier as it browns. Its texture depends largely on how it is prepared. Quick cooking over high heat can make the pods crisp and lightly charred, while slow simmering turns them tender and releases the natural juices that help thicken soups and stews.
Those juices are also responsible for okra’s sometimes-misunderstood reputation. When the pods are sliced, they release a thick liquid called mucilage. This quality is useful in gumbo and other long-cooked dishes, but it can be minimized when that is not the desired result. Starting with dry pods, using a large pan, cooking over relatively high heat, and avoiding unnecessary stirring all help okra brown rather than steam.
If you have only encountered okra boiled until very soft, it is well worth giving the vegetable another chance. Roasted, fried, grilled, pickled, sautéed, or gently braised, fresh okra is far more versatile than its reputation suggests.
Buying & Storing Cheat Sheet
| DOs | DON’Ts |
| Look for bright green pods that feel firm and springy. | Don’t choose pods with dark spots, deep blemishes, or shriveled ends. |
| Select small to medium pods, ideally about 2 to 4 inches long. They are generally more tender than very large pods. | Don’t assume larger pods offer better value. Oversized okra can be woody and fibrous. |
| Check that the stems look fresh rather than dry or blackened. | Don’t buy pods that feel soft, limp, bruised, or sticky. |
| Store okra unwashed in a paper bag or loosely closed produce bag in the refrigerator. | Don’t wash okra before storing it. Excess moisture encourages deterioration. |
| Plan to use fresh okra within two to three days for the best texture. | Don’t leave it forgotten in the refrigerator for a week. Okra is more perishable than many sturdy vegetables. |
| Wash and dry the pods thoroughly just before cooking. | Don’t slice the pods until you are ready to use them. |
| Blanch and freeze extra okra if you have more than you can use while it is fresh. | Don’t thaw frozen okra before roasting it or adding it to many cooked dishes; cooking it from frozen helps it retain more structure. |
General Uses for Okra
Okra can behave like several different vegetables depending on how it is cut and cooked. Whole pods hold their shape and are easy to roast, grill, or pickle. Sliced okra cooks more quickly and works especially well in skillet dishes, soups, stews, and crispy cornmeal coatings.
Before preparing it, rinse the okra under cool water and dry it very thoroughly. A clean kitchen towel or paper towels work well. Trim away the dry tip of the stem without cutting deeply into the pod unless the recipe instructs otherwise.
Roast or Air-Fry It
Roasting is one of the easiest introductions to okra, especially for anyone concerned about its texture. High oven heat evaporates moisture quickly and gives the pods browned edges and a pleasantly concentrated flavor. Smaller pods can be left whole, while medium ones may be halved lengthwise to expose more surface area to the heat.
Toss the okra lightly with oil and seasonings, then spread it out in a single layer. Space is important: crowded okra traps steam and softens rather than browns. Garlic powder, smoked paprika, cayenne, Cajun seasoning, cumin, and lemon zest all work particularly well.
An air fryer produces similar results in less time. Cook the okra in batches if necessary so hot air can circulate around the pieces.
Sauté It Quickly
A skillet makes it easy to combine okra with other summer produce. Corn adds sweetness, tomatoes provide acidity, and peppers and onions contribute depth. The key is to begin with a wide pan and let the okra cook undisturbed for short intervals. Constant stirring prevents the cut surfaces from making sustained contact with the hot pan.
Cook okra before adding juicy vegetables such as tomatoes. If everything enters the skillet at once, the released liquid can cause the okra to steam. Once the pods are lightly browned, the remaining ingredients can be added to create a quick side dish or a topping for rice, grits, or another grain.
Add It to Soups and Stews
Okra’s natural thickening quality is especially valuable in soups, stews, curries, and gumbo. As sliced okra simmers, it releases mucilage that adds body to the surrounding broth. It is not merely tolerated in these dishes—it is part of what makes their texture so satisfying.
For a thicker stew, add sliced okra early and allow it to cook down. For more distinct pieces and a lighter broth, stir it in later. Its mild flavor pairs readily with tomatoes, garlic, ginger, warm spices, seafood, poultry, and smoked meats.
Fry It Until Crisp
Fried okra is a classic for good reason. The coating becomes deeply crisp while the interior remains tender, creating a contrast that is difficult to achieve with gentler cooking methods. Sliced okra is often dipped in buttermilk before being tossed in seasoned cornmeal, which creates a rustic coating with plenty of crunchy edges.
Proper oil temperature matters. If the oil is too cool, the coating can absorb excess fat; if it is too hot, the exterior may darken before the okra becomes tender. Frying in small batches helps the oil maintain a steady temperature.
Pickle It
Because okra pods are naturally firm and hollow, they pickle beautifully. Small pods can be packed whole into jars with garlic, dill, mustard seeds, or chiles. A vinegar brine gives them a lively flavor while preserving their crisp shape.
Quick refrigerator pickles are simpler than shelf-stable canned pickles because they do not require a water-bath canning process. They must remain refrigerated, but they are an easy way to extend the life of a modest farmers’ market haul. Serve them on appetizer boards, tuck them beside sandwiches, add them to salads, or chop them into relishes.
Grill It
Okra is also surprisingly convenient to grill. Whole pods are large enough to sit across most grill grates without falling through, and their ridges take on attractive charred spots. Toss them with a small amount of oil, grill just until tender, and finish them with lemon juice and flaky salt.
A squeeze of citrus or splash of vinegar is particularly helpful because acidity brightens okra’s earthy flavor. Grilled okra can also be served with hot sauce, herb dressing, or a cool yogurt dip.
Okra Recipes
Crispy Oven-Roasted Okra with Smoky Yogurt Sauce

Roasted okra needs very little preparation to become a crisp-edged, snackable side dish. Splitting the pods lengthwise exposes their interiors to the oven’s heat and gives the seasonings more surface area to cling to. The cut sides also develop especially flavorful browned spots where they meet the hot pan.
A cool yogurt sauce makes a welcome contrast to the smoky paprika and warm cayenne. Serve the okra straight from the oven, when its edges are at their crispest. It makes an excellent appetizer, but it is just as comfortable beside grilled chicken, fish, burgers, or a spread of summer vegetables.
Makes 4 servings
Ingredients
For the okra:
- 1 pound fresh okra
- 1½ tablespoons olive oil
- ¾ teaspoon smoked paprika
- ½ teaspoon garlic powder
- ½ teaspoon kosher salt
- ¼ teaspoon freshly ground black pepper
- Pinch of cayenne pepper, optional
For the smoky yogurt sauce:
- ½ cup plain Greek yogurt
- 1 tablespoon fresh lemon juice
- ½ teaspoon honey
- ¼ teaspoon smoked paprika
- ¼ teaspoon garlic powder
- ⅛ teaspoon kosher salt
- 1 to 2 teaspoons water, as needed
- Chopped fresh parsley, for serving, optional
Instructions
- Preheat the oven to 450°F. Place a large, rimmed baking sheet in the oven while it heats.
- Wash the okra and dry it very thoroughly. Trim the dry ends of the stems, then cut the pods in half lengthwise.
- Place the okra in a large bowl. Add the olive oil, smoked paprika, garlic powder, salt, black pepper, and cayenne, if using. Toss until the pods are evenly coated.
- Carefully remove the hot baking sheet from the oven. Arrange the okra in a single layer, placing as many pieces cut-side down as possible. Leave a little space between the pieces so they roast instead of steam.
- Roast for 10 minutes. Turn the okra and continue roasting for 8 to 12 minutes, until it is tender and deeply browned around the edges. Very small pods may cook more quickly.
- While the okra roasts, whisk together the yogurt, lemon juice, honey, smoked paprika, garlic powder, and salt. Add water, 1 teaspoon at a time, until the sauce reaches a creamy dipping consistency.
- Transfer the roasted okra to a serving platter. Sprinkle with parsley, if desired, and serve immediately with the yogurt sauce.
Summer Okra, Corn, and Tomato Skillet

Few dishes capture the height of summer quite as neatly as a skillet filled with okra, corn, and tomatoes. The vegetables bring different qualities to the pan: okra becomes nutty and lightly crisp, corn contributes sweetness, and tomatoes release just enough juice to pull everything together.
The order in which the ingredients are added makes a difference. Browning the okra on its own first gives it a head start before the tomatoes introduce moisture. The finished dish is still juicy, but the okra retains more definition and texture.
Serve this colorful combination alongside grilled meats or seafood, spoon it over rice, or top it with a fried egg for a simple supper. It is also excellent at room temperature, making it a convenient addition to a summer buffet.
Makes 4 to 6 servings
Ingredients
- 1 pound fresh okra
- 3 ears fresh corn, or about 2 cups corn kernels
- 2 tablespoons olive oil, divided
- ½ medium yellow onion, diced
- ½ teaspoon kosher salt, divided, plus more to taste
- ¼ teaspoon freshly ground black pepper
- 2 garlic cloves, minced
- 2 cups cherry tomatoes, halved
- ½ teaspoon smoked paprika
- Pinch of red pepper flakes, optional
- 2 teaspoons red wine vinegar or fresh lemon juice
- ¼ cup chopped fresh basil or flat-leaf parsley
Instructions
- Wash the okra and dry it thoroughly. Trim the stem ends and cut the pods crosswise into ½-inch pieces.
- Cut the corn kernels from the cobs, if using fresh corn. Keep the corn and tomatoes separate so they can be added at different stages.
- Heat 1 tablespoon of the olive oil in a large skillet, preferably cast iron, over medium-high heat. Add the okra in an even layer and sprinkle it with ¼ teaspoon of the salt and the black pepper.
- Cook the okra for 6 to 8 minutes, stirring only occasionally, until it is lightly browned and beginning to soften. Transfer it to a plate.
- Reduce the heat to medium. Add the remaining tablespoon of olive oil and the onion to the skillet. Cook for 3 to 4 minutes, until the onion begins to soften.
- Add the corn and cook for 3 minutes, stirring occasionally. Stir in the garlic, smoked paprika, and red pepper flakes, if using, and cook for 30 seconds.
- Return the okra to the pan. Add the tomatoes and the remaining ¼ teaspoon salt. Cook for 3 to 5 minutes, until the tomatoes are warmed through and beginning to release their juices but have not completely broken down.
- Remove the skillet from the heat. Stir in the vinegar or lemon juice and most of the fresh herbs. Taste and adjust the seasoning, then garnish with the remaining herbs before serving.
Cornmeal-Crusted Fried Okra

Fried okra is at its best when it does not look overly uniform. A craggy cornmeal coating creates crisp little edges, while glimpses of green okra remain visible underneath. Buttermilk helps the dry mixture adhere without forming an overly heavy shell.
A blend of cornmeal and flour produces a coating that is both crunchy and cohesive. The seasonings here are flavorful without overpowering the okra, but a little extra cayenne can be added for more heat.
Use a deep, heavy pan and a thermometer if you have one. Frying in small batches may take a few extra minutes, but it prevents the oil temperature from falling dramatically and gives each piece enough room to become crisp.
Makes 6 appetizer or side-dish servings
Ingredients
For the okra:
- 1 pound fresh okra
- 1 cup buttermilk
- ¾ cup fine or medium-ground yellow cornmeal
- ½ cup all-purpose flour
- 1 teaspoon kosher salt
- ¾ teaspoon smoked paprika
- ½ teaspoon garlic powder
- ½ teaspoon onion powder
- ¼ teaspoon freshly ground black pepper
- ⅛ to ¼ teaspoon cayenne pepper
- Neutral oil, such as vegetable or canola oil, for frying
For the dipping sauce:
- ½ cup mayonnaise
- 2 tablespoons buttermilk
- 1 tablespoon fresh lemon juice
- 1 tablespoon finely chopped fresh parsley
- 1 teaspoon Dijon mustard
- ½ teaspoon hot sauce, or more to taste
- Pinch of kosher salt
Instructions
- Whisk together the mayonnaise, buttermilk, lemon juice, parsley, Dijon mustard, hot sauce, and salt. Cover and refrigerate the sauce while preparing the okra.
- Wash the okra and dry it thoroughly. Trim away the stem ends and cut the pods crosswise into ½-inch pieces.
- Place the sliced okra in a medium bowl and pour the buttermilk over it. Stir until all the pieces are coated. Let the okra stand for 10 minutes.
- In a large shallow bowl, whisk together the cornmeal, flour, salt, smoked paprika, garlic powder, onion powder, black pepper, and cayenne.
- Pour the oil into a deep, heavy-bottomed pot or skillet to a depth of about 1½ inches. Heat it over medium-high heat to 350°F. Line a baking sheet or large platter with a wire rack or paper towels.
- Lift about one-quarter of the okra from the buttermilk, allowing the excess to drip away. Transfer it to the cornmeal mixture and toss until thoroughly coated. Shake away any loose coating.
- Carefully lower the coated okra into the hot oil. Fry for 2 to 3 minutes, stirring gently once or twice, until golden brown and crisp.
- Remove the okra with a slotted spoon or wire skimmer and transfer it to the prepared rack or platter. Sprinkle lightly with salt while it is hot.
- Allow the oil to return to 350°F before coating and frying the next batch. Repeat until all the okra has been fried.
- Serve the fried okra immediately with the chilled dipping sauce.
Tomato-Braised Okra with Garlic and Herbs

Braising reveals a completely different side of okra. Instead of emphasizing crispness, this recipe lets the pods turn tender in a savory mixture of tomatoes, onions, garlic, and herbs. The result is comforting and richly flavored without being heavy.
Leaving very small pods whole helps them maintain their shape, while cutting larger ones in half ensures that everything cooks at roughly the same rate. The tomatoes’ acidity balances okra’s earthy character and creates a light sauce that is particularly good spooned over rice or soaked up with bread.
This dish can accompany roasted chicken or fish, but it is substantial enough to anchor a simple meatless meal. Add chickpeas during the final portion of cooking if you would like to make it heartier.
Makes 4 to 6 servings
Ingredients
- 1 pound fresh okra
- 2 tablespoons olive oil
- 1 medium yellow onion, thinly sliced
- ¾ teaspoon kosher salt, divided
- 3 garlic cloves, minced
- ¼ teaspoon red pepper flakes, optional
- 1 can (14½ ounces) diced tomatoes, with their juices
- ½ cup vegetable or chicken broth
- 1 teaspoon dried oregano
- ½ teaspoon dried thyme
- ¼ teaspoon freshly ground black pepper
- 1 teaspoon honey or sugar, optional
- 1 tablespoon fresh lemon juice
- 2 tablespoons chopped fresh parsley
Instructions
- Wash the okra and dry it thoroughly. Trim the dry stem tips, taking care not to cut deeply into the pods. Leave small pods whole and cut larger pods in half crosswise.
- Heat the olive oil in a large skillet or shallow Dutch oven over medium heat. Add the onion and ¼ teaspoon of the salt. Cook for 7 to 8 minutes, stirring occasionally, until softened and lightly golden.
- Add the garlic and red pepper flakes, if using. Cook for 30 seconds, stirring constantly.
- Add the diced tomatoes and their juices, broth, oregano, thyme, black pepper, honey or sugar, if using, and the remaining ½ teaspoon salt. Stir to combine and bring the mixture to a gentle simmer.
- Add the okra and stir once to coat it with the tomato mixture. Reduce the heat to medium-low and cover the pan. Simmer for 15 minutes.
- Uncover and gently stir the okra. Continue cooking for 8 to 12 minutes, until the pods are tender and the sauce has thickened slightly. Avoid stirring excessively, which can cause the pods to break apart.
- Remove the pan from the heat and stir in the lemon juice. Taste and adjust the salt or pepper as needed.
- Sprinkle with fresh parsley and serve warm with rice, couscous, crusty bread, grilled meat, or fish.
Quick Refrigerator Pickled Okra

Pickling is an excellent way to preserve okra’s naturally crisp texture. Small pods work best because they fit more easily into jars and tend to be tender enough to eat whole. A simple combination of dill, garlic, mustard seeds, and peppercorns complements their flavor without obscuring it.
These are refrigerator pickles rather than shelf-stable canned pickles. The jars are filled with hot brine, cooled, and stored in the refrigerator; they have not been processed for pantry storage. Allow the okra to pickle for at least three days before tasting it. Its flavor will continue to deepen over the following week.
Serve the pickles cold as a snack or alongside sandwiches and burgers. They are also a lively addition to cheese boards, chopped salads, deviled eggs, and relish trays.
Makes about 2 pint jars
Ingredients
- ¾ pound small fresh okra pods, preferably no longer than 4 inches
- 4 garlic cloves, lightly crushed
- 4 fresh dill sprigs
- 2 teaspoons mustard seeds
- 1 teaspoon black peppercorns
- ½ teaspoon red pepper flakes, optional
- 1 cup distilled white vinegar
- 1 cup water
- 1 tablespoon kosher salt
- 2 teaspoons granulated sugar
Instructions
- Wash two pint-size jars, their lids, and rings in hot, soapy water. Rinse them thoroughly. This recipe is intended only for refrigerated storage, not shelf-stable canning.
- Wash the okra and dry it thoroughly. Trim only the dry tips from the stems, being careful not to cut into the pods.
- Divide the garlic, dill, mustard seeds, peppercorns, and red pepper flakes, if using, between the two jars.
- Pack the okra upright into the jars, alternating the direction of the pods as needed so they fit snugly. Leave about ½ inch of space at the top of each jar.
- Combine the vinegar, water, salt, and sugar in a small saucepan. Bring the mixture to a boil over medium-high heat, stirring until the salt and sugar dissolve.
- Carefully pour the hot brine over the okra, leaving about ¼ inch of space at the top. Gently tap the jars against the counter to release trapped air bubbles. Add more brine if necessary to keep the okra covered.
- Wipe the rims and secure the lids. Let the jars cool at room temperature for no longer than 1 hour, then refrigerate them.
- Allow the okra to pickle for at least 3 days before serving. For the best flavor, wait 5 to 7 days. Keep the pickles refrigerated and use them within one month. Discard them if the brine becomes fizzy, develops mold, smells unpleasant, or shows other signs of spoilage.
Make the Most of Okra Season
Fresh okra has much more range than its reputation sometimes allows. It can be crisp and smoky after a turn in a hot oven, crunchy beneath a cornmeal coating, tender in a tomato-rich braise, or pleasantly tangy after several days in a jar of seasoned brine.
If you are still uncertain about okra, begin with roasting or sautéing. These high-heat methods showcase its mild flavor and encourage browned edges while minimizing the texture that often gives newcomers pause. From there, try it fried, grilled, pickled, or simmered into a dish where its natural thickening ability becomes an advantage.
Most importantly, choose small, firm pods and use them promptly. Okra season does not last forever, and this heat-loving vegetable deserves a place alongside the tomatoes, corn, and peppers that define late-summer cooking.



Leave a Reply