

Summer gear works hard. Beach towels collect sand and sunscreen, swimsuits are repeatedly exposed to chlorine and saltwater, and sports bags absorb sweat, dirt, and moisture. By the end of the season, even equipment that appears clean may be holding on to residue that can cause stains, odors, mildew, rust, or material breakdown during storage.
A thorough end-of-season reset helps everything last longer and makes next summer’s first outing much easier. Instead of opening a bin to discover a musty beach blanket or a cracked inflatable, you will have clean, organized gear ready to use. Set aside an afternoon, gather everything in one place, and work through the process by category.
Start with a Complete Gear Check
Before cleaning anything, collect your summer gear from all the places where it tends to accumulate. Check the garage, mudroom, laundry room, patio, car trunk, pool bag, and outdoor storage containers. Bringing everything together prevents damp towels, forgotten water bottles, and sand-filled shoes from remaining hidden until next season.

As you sort, inspect each item closely. Cleaning and storing damaged equipment only postpone the decision about what to do with it. This is the best time to make small repairs, replace missing pieces, and let go of anything that is no longer safe or useful.
Sort your gear into four basic groups:
- Items that can be machine-washed
- Items that need to be hand-washed or spot-cleaned
- Hard equipment that can be rinsed or wiped down
- Items that require repairs, replacement, or disposal
Look for signs of wear such as:
- Cracks in helmets, paddles, toys, or hard coolers
- Frayed straps and loose stitching
- Torn mesh, canvas, or umbrella fabric
- Rust on chair frames, fasteners, and zippers
- Deflated balls or inflatables that may have leaks
- Broken buckles, handles, clips, or closures
- Mildew, persistent odors, or stains that may require extra treatment
Place small loose pieces—such as air-pump attachments, umbrella anchors, game pieces, and repair patches—in a container so they do not disappear while you clean.
Clean Beach Towels, Blankets, and Fabric Accessories
Sand is much easier to remove when it is dry. Before washing beach towels, blankets, fabric totes, and cover-ups, take them outside and shake them thoroughly. If sand remains trapped in the fibers, use a soft brush or a vacuum attachment to loosen it. Sending heavily sand-covered fabrics directly into the washing machine can leave grit in both the fabric and the appliance.

Check care labels before laundering, particularly on insulated totes and blankets with waterproof backings. Pretreat visible sunscreen, food, grass, or drink stains using a product appropriate for the fabric. Sunscreen stains may not be obvious at first, but oils left in the fibers can darken or develop an unpleasant odor in storage.
For the best results:
- Wash towels and washable blankets according to their care labels.
- Use an appropriate amount of detergent rather than adding extra.
- Skip fabric softener on towels because it can coat the fibers and reduce absorbency.
- Wash light and dark colors separately if bleeding is a concern.
- Run an additional rinse cycle if the fabric still feels soapy or stiff.
- Dry each item completely before folding it.
If towels have developed a musty smell, rewash them rather than trying to mask the odor with fragrance. Storing even slightly stale-smelling fabric in a closed bin will usually make the problem worse.
Wash Swimsuits, Life Jackets, and Water Shoes
Swim gear is exposed to a particularly demanding combination of chlorine, salt, sunscreen, body oils, heat, and repeated stretching. A quick rinse after every use is helpful, but a careful cleaning at the end of the season removes residue that might otherwise weaken elastic or discolor fabric during storage.

Hand-wash swimsuits in cool water with a small amount of mild detergent. Avoid aggressively scrubbing, twisting, or wringing the fabric. After rinsing, gently press out excess water and lay the suits flat or hang them away from strong direct sunlight. High dryer temperatures can damage elastic fibers and alter the fit.
When cleaning swim gear:
- Fasten hooks or closures so they do not snag the fabric.
- Rinse swimsuits thoroughly until the water runs clear.
- Avoid bleach unless the care label specifically permits it.
- Allow padded areas and linings additional time to dry.
- Store swimsuits flat or loosely folded rather than stretched on hangers.
Life jackets and personal flotation devices should be cleaned according to the manufacturer’s directions. In most cases, they can be rinsed with fresh water and gently cleaned with mild soap and a soft brush or cloth. Do not machine-wash, dry-clean, or use harsh chemicals unless the label states that it is safe. Inspect straps, buckles, seams, and flotation material for deterioration before storing.
Water shoes and sandals can harbor sand in their soles, straps, and drainage openings. Rinse them thoroughly, scrub the bottoms if needed, and remove insoles when possible. Let all parts air-dry separately in a ventilated location.
Remove Sand from Chairs, Umbrellas, and Canopies
Beach chairs, umbrellas, portable tents, and canopies have numerous folds, hinges, sleeves, and seams where sand and moisture can hide. Open each item completely before cleaning so you can reach the areas that remain concealed when the equipment is folded.

Begin with dry cleaning methods. Brush away loose sand or use a vacuum with a brush attachment. Once most of the grit is gone, wipe fabric and frames with a solution of mild soap and water. Rinse salt residue from metal poles, hinges, and fasteners because it can encourage corrosion during storage.
Take a few extra steps before folding these larger pieces away:
- Check fabric for small tears or separating seams.
- Inspect umbrella ribs and canopy poles for bending or damage.
- Remove dried mud or salt from chair legs and feet.
- Clean cup holders, pockets, armrests, and carrying straps.
- Open and close hinges to make sure they move freely.
- Follow manufacturer instructions before applying lubricant or rust protection to metal parts.
- Leave everything fully open until it is completely dry.
Do not rely on surface dryness alone. Water can remain inside fabric sleeves, frame joints, umbrella folds, and carrying cases long after the exterior feels dry. If possible, allow large gear to remain open in a shaded, breezy place for a full day before packing it.
Clean Coolers, Water Bottles, and Food Containers
Coolers and reusable drinkware should never be stored with food residue inside. Even a few crumbs, a splash of juice, or moisture trapped beneath a seal can produce odors or attract pests. Empty every pocket and compartment, including zippered sections that may contain forgotten wrappers, utensils, or condiment packets.

Wash hard-sided coolers with warm water and dish soap. Pay particular attention to drains, hinges, handles, gaskets, and the groove where the lid meets the cooler. Use a soft brush to reach textured surfaces and tight corners, then rinse and dry thoroughly.
For soft-sided coolers, follow the care label. Many should be wiped or hand-washed rather than placed in a washing machine. Open all compartments and prop the cooler so air can circulate through the insulated interior.
Remember to:
- Remove and wash reusable ice packs.
- Disassemble water-bottle lids, straws, valves, and silicone seals.
- Clean beneath removable gaskets where residue can collect.
- Check food containers for warped lids or lingering stains.
- Treat appropriate surfaces with a mild baking soda solution if odors persist.
- Replace components that remain moldy or cannot be thoroughly cleaned.
Once the cooler is dry, store it with its lid slightly open. Soft coolers should also be left partially unzipped when practical. A small amount of airflow can prevent the closed, stale odor that often develops during long storage.
Rinse and Inspect Sports Equipment
Sports equipment collects more than visible dirt. Sweat, sunscreen, skin oils, grass, and dust can settle into grips, padding, straps, and textured surfaces. Cleaning requirements vary widely, so check the manufacturer’s instructions before soaking equipment or using disinfecting products.

Wipe down balls, bats, rackets, paddles, protective equipment, and other hard surfaces with a lightly damp cloth and a mild cleaning solution suitable for the material. Avoid saturating foam, padding, leather, or openings where water could become trapped.
As you clean, check the condition of each item:
- Inspect balls for cracks, leaks, or misshapen areas.
- Examine racket strings, grips, and frames for wear.
- Check helmets for cracks, dents, compressed padding, and damaged straps.
- Look for fraying on pads, gloves, and protective gear.
- Remove dirt from cleats and athletic shoes.
- Inspect metal equipment for corrosion.
- Wash removable liners only when permitted by the care instructions.
Inflatables should be clean and dry before they are deflated. Some balls and toys store best with a small amount of air remaining, so the material is not sharply creased. Follow the manufacturer’s recommendation and keep the correct pump and valve attachments with the equipment.
Safety equipment deserves particular care. If a helmet or protective item has sustained a significant impact, appears damaged, or has reached the end of its recommended life, replace it rather than storing it for another season.
Freshen Sports Bags and Beach Totes
A clean collection of gear should not go back into a bag filled with sand, crumbs, and lingering odors. Empty every pocket and shake the bag outdoors. Turn out pocket linings when possible, then vacuum seams, corners, and the bottom of the bag.

Check the care label before placing a bag in the washing machine. Structured, insulated, coated, or reinforced bags may need to be spot-cleaned. A cloth dipped in mild soapy water is often enough to clean the interior and exterior without saturating the material.
To prepare bags for storage:
- Remove wet clothing, used tissues, wrappers, and loose food.
- Clean reusable pouches and organizers separately.
- Wipe down plastic or waterproof linings.
- Scrub visible stains with a soft brush when appropriate.
- Open every zipper and compartment during drying.
- Wash or replace heavily soiled shoe and laundry bags.
- Confirm that the base, seams, and padded straps are fully dry.
Store empty bags loosely rather than crushing them beneath heavy equipment. Leaving zippers partially open will improve airflow, especially in lined or water-resistant bags.
Make Sure Everything Is Completely Dry
Drying is the most important part of the entire process. A tiny amount of moisture sealed inside a tote, folded chair, life jacket, or storage bin can lead to mildew, staining, and musty odors. Padded and layered items may feel dry on the outside while remaining damp within.
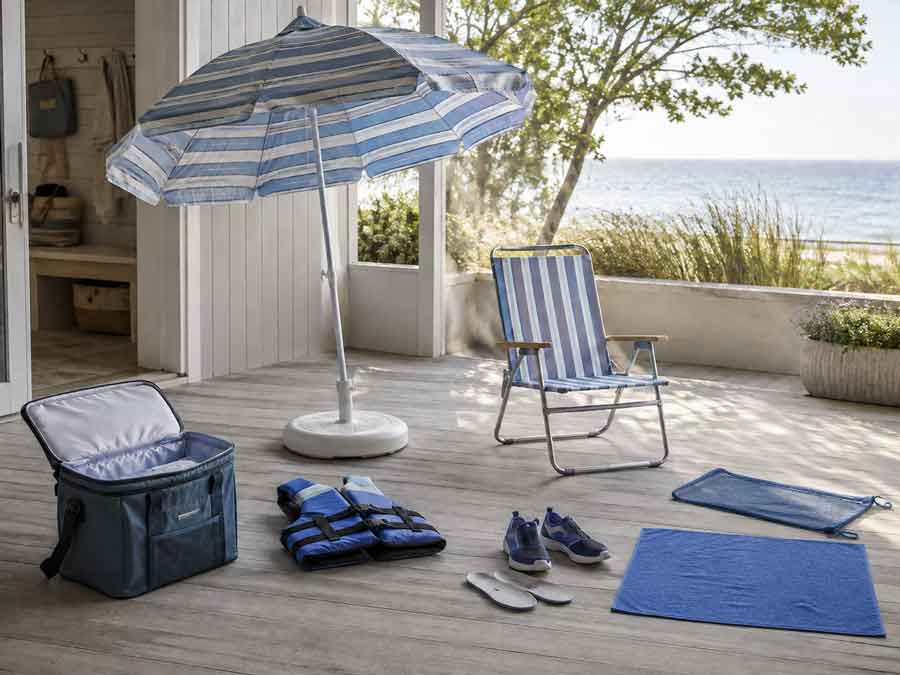
Choose a shaded, well-ventilated place for air-drying. Long exposure to intense sunlight can fade fabric, weaken plastic, and degrade elastic, so airflow is generally more useful than heat.
Before storing an item:
- Open all pockets, flaps, folds, and closures.
- Remove liners, insoles, and detachable padding when possible.
- Turn soft items over so both sides receive airflow.
- Extend umbrella and canopy fabric fully.
- Open valves on appropriate inflatables after cleaning.
- Allow thick, padded, or insulated items extra drying time.
- Check seams and crevices by touch before packing.
If you are uncertain whether an item is dry, wait another day. The small inconvenience is preferable to discovering a container of mildewed gear months later.
Organize Gear by Activity
Once everything is clean and dry, group items according to how your household uses them. Keeping beach-day supplies separate from backyard games or team-sports equipment makes it easier to find what you need without unpacking multiple containers.

Clear bins are helpful because their contents remain visible, but opaque containers work just as well when they are clearly labeled. Choose containers that are large enough to hold gear without bending, crushing, or tightly compressing it.
Possible storage categories include:
- Beach towels and blankets
- Swimming and pool gear
- Beach chairs and umbrellas
- Backyard games
- Baseball, soccer, or tennis equipment
- Camping and picnic supplies
- Coolers and reusable food containers
- Pumps, patches, anchors, and replacement parts
Use small, zippered pouches or transparent containers for loose accessories. Keep game pieces together, place repair materials near the equipment they belong to, and label unfamiliar parts so you remember their purpose next summer.
Hooks and wall racks are useful for chairs, bags, paddles, and other equipment that can be safely stored vertically. Balls can go into a ventilated basket or mesh bag rather than rolling around a shelf. Avoid tightly sealing anything that benefits from airflow.
Choose the Right Storage Location
The best storage location is cool, dry, and protected from direct sunlight. Damp basements, extremely hot attics, and outdoor sheds with fluctuating temperatures can damage fabric, plastic, rubber, adhesives, and protective padding.

If the garage is your most practical option, keep gear on shelves or wall hooks rather than directly on the floor. This protects it from minor flooding, pests, spills, and moisture that can rise through concrete. Avoid placing heavy bins on top of hats, life jackets, inflatables, or structured bags.
When choosing a location:
- Keep fabric and padded equipment away from damp walls.
- Avoid storing gear beside chemicals, fertilizers, or automotive fluids.
- Place rarely used seasonal items above everyday supplies.
- Keep heavy containers on lower shelves.
- Leave space around soft-sided gear for air circulation.
- Protect equipment from rodents and insects.
- Make sure shelves and hooks can support the weight safely.
Some high-value or safety-related equipment may be better stored indoors, particularly if the garage or shed becomes extremely hot, cold, or humid.
Create a Ready-for-Next-Summer Kit
Before closing the last bin, assemble the small reusable items that make summer outings easier. Keeping them together saves time when the first warm weekend arrives and reduces the chance of buying duplicates because something cannot be found.
A ready-for-summer kit might include:
- Waterproof phone pouches
- Reusable snack bags and food containers
- Towel clips and clothespins
- Goggles and swim caps
- Ball pumps and valve attachments
- Umbrella anchors
- Small repair kits and inflatable patches
- Reusable utensils and bottle openers
- Mesh bags for wet clothing
- Portable game pieces and instruction cards
Do not store anything that can expire, leak, freeze, melt, or attract pests. Remove sunscreen, insect repellent, food, batteries, medications, and personal-care products unless their labels confirm that the storage conditions are appropriate.
Finally, add a short note to the top of the bin listing anything that needs to be purchased or repaired. If the beach umbrella is missing an anchor or a child will need a larger life jacket next year, writing it down now is much more reliable than trying to remember months later.
A Little Work Now Makes Next Summer Easier
Cleaning summer gear may not be the most exciting way to mark the change of seasons, but it prevents many of the unpleasant surprises that appear when warm weather returns. Sand is easier to remove before it becomes embedded, stains are more likely to come out before they sit for months, and repairs are simpler to identify while the season’s activities are still fresh in your mind.
By cleaning each item properly, allowing plenty of drying time, and organizing gear by activity, you protect the things you already own and make future outings less stressful. When next summer arrives, you can open an orderly bin of fresh towels, clean equipment, and neatly grouped accessories and head outside without beginning the season with another round of chores.



Leave a Reply